Gitea
What is Gitea
From https://gitea.io/
Gitea is a community managed lightweight code hosting solution written in Go. It is published under the MIT license.
This is based on authentik 2022.10.1 and Gitea 1.17.3 installed using the official docker image https://docs.gitea.io/en-us/install-with-docker/. Instructions may differ between versions.
Preparation
The following placeholders will be used:
authentik.companyis the FQDN of authentik.gitea.companyis the FQDN of Gitea.
Step 1
In authentik, create an OAuth2/OpenID Provider (under Applications/Providers) with these settings:
Only settings that have been modified from default have been listed.
Protocol Settings
- Name: Gitea
- Signing Key: Select any available key
Take note of the Client ID and Client Secret, you'll need to give them to Gitea in Step 3.
Step 2
In authentik, create an application (under Applications/Applications) which uses this provider. Optionally apply access restrictions to the application using policy bindings.
Only settings that have been modified from default have been listed.
- Name: Gitea
- Slug: gitea-slug
- Provider: Gitea
Step 3
Navigate to the Authentication Sources page at https://gitea.company/admin/auths and click Add Authentication Source
Change the following fields
- Authentication Name: authentik
- OAuth2 Provider: OpenID Connect
- Client ID (Key): Step 1
- Client Secret: Step 1
- Icon URL: https://authentik.company/static/dist/assets/icons/icon.svg
- OpenID Connect Auto Discovery URL: https://authentik.company/application/o/gitea-slug/.well-known/openid-configuration
- Additional Scopes:
email profile
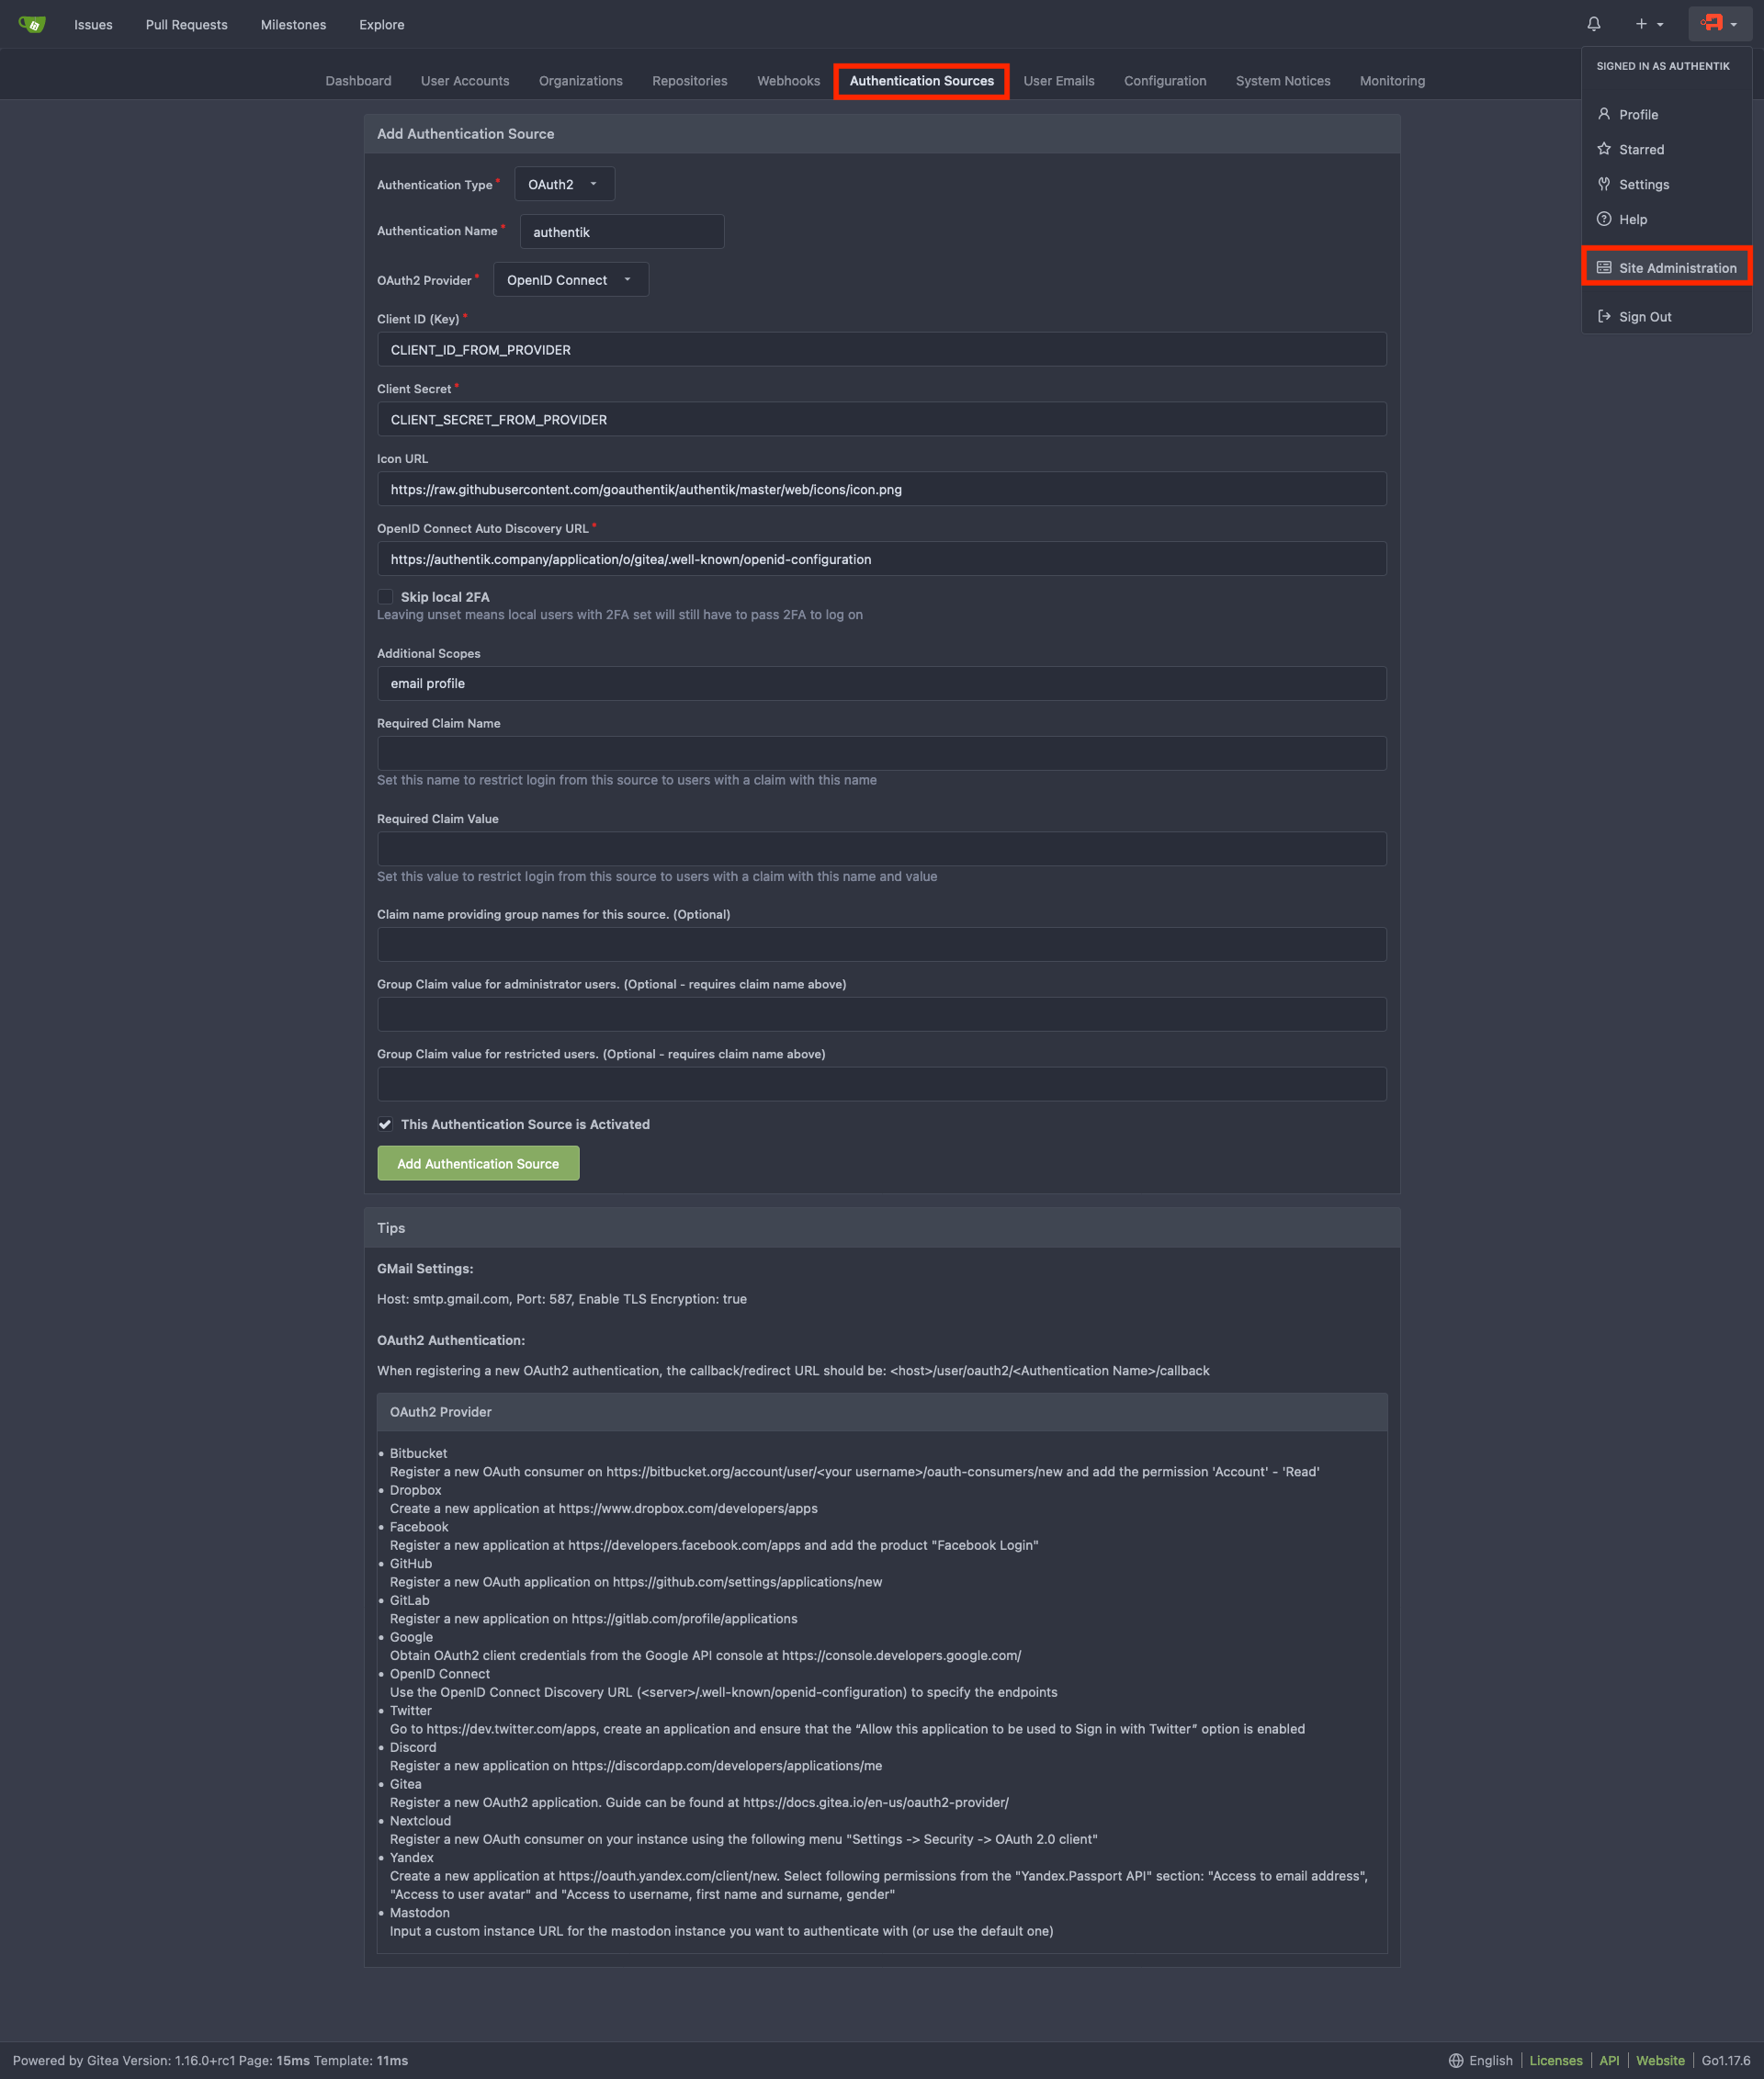
Add Authentication Source and you should be done. Your Gitea login page should now have a Sign in With followed by the authentik logo which you can click on to sign-in to Gitea with Authentik creds.
Step 4 (optional Claims for authorization management)
This step is optional and shows how to set claims to control the permissions of users in gitea by adding them to groups.
Define Groups
The following groups will be used:
gituserfor normal Gitea users.gitadminfor Gitea users with administrative permissions.gitrestrictedfor restricted Gitea users.
Users who are in none of these groups will not be able to log in to gitea.
In authentik, create three groups (under Directory/Groups) with the Name as mentioned above and leave other settings untouched.
You can add Members to the groups now or anytime later.
Create Custom Property Mapping
In authentik, create a custom property mapping (under Customization/Property Mappings) which has the type Scope Mapping.
Only settings that have been modified from default have been listed.
- Name: authentik gitea OAuth Mapping: OpenID 'gitea'
- Scope name: gitea
And as Expression set the following:
gitea_claims = {}
if request.user.ak_groups.filter(name="gituser").exists():
    gitea_claims["gitea"]= "user"
if request.user.ak_groups.filter(name="gitadmin").exists():
    gitea_claims["gitea"]= "admin"
if request.user.ak_groups.filter(name="gitrestricted").exists():
    gitea_claims["gitea"]= "restricted"

return gitea_claims
Add the custom Property Mapping to the Gitea Provider
In authentik, edit the Gitea provider (under Applications/Providers) by clicking the pencil Icon.
Unfold the Advanced protocol settings and activate these Mappings:
- authentik default OAuth Mapping: OpenID 'email'
- authentik default OAuth Mapping: OpenID 'profile'
- authentik default OAuth Mapping: OpenID 'openid'
- authentik gitea OAuth Mapping: OpenID 'gitea'
Click Update and the configuration authentik is done.
Configure Gitea to use the new claims
Navigate to the Authentication Sources page at https://gitea.company/admin/auths and edit the authentik Authentication Source.
Change the following fields
- Additional Scopes:
email profile gitea - Required Claim Name:
gitea - Claim name providing group names for this source. (Optional):
gitea - Group Claim value for administrator users. (Optional - requires claim name above):
admin - Group Claim value for restricted users. (Optional - requires claim name above):
restricted
Update Authentication Source and you should be done.
Users without any of the defined groups should no longer be able to log in. Users of the group gitadmin should have administrative privileges, and users in the group gitrestricted should be restricted.
Helm Chart Configuration
authentik can be configured automatically in Gitea Kubernetes deployments via it's Helm Chart.
This is based on authentik 2022.8.2, Gitea v17.2, and Gitea Helm Chart v6.0.1. Instructions may differ between versions.
Add the following to the Gitea Helm Chart values.yaml file:
gitea:
    oauth:
        - name: "authentik"
          provider: "openidConnect"
          key: "CLIENT_ID_FROM_AUTHENTIK" #Step 1
          secret: "CLIENT_SECRET_FROM_AUTHENTIK" #Step 1
          autoDiscoveryUrl: "https://authentik.company/application/o/gitea-slug/.well-known/openid-configuration"
          iconUrl: "https://goauthentik.io/img/icon.png"
          scopes: "email profile"
Kubernetes Secret
Alternatively you can use a Kubernetes secret to set the key and secret values.
Create a Kubernetes secret with the following:
apiVersion: v1
kind: Secret
metadata:
    name: gitea-authentik-secret
type: Opaque
stringData:
    key: "CLIENT_ID_FROM_AUTHENTIK" #Step 1
    secret: "CLIENT_SECRET_FROM_AUTHENTIK" #Step 1
Add the following to the Gitea Helm Chart values.yaml file:
gitea:
    oauth:
        - name: "authentik"
          provider: "openidConnect"
          existingSecret: gitea-authentik-secret
          autoDiscoveryUrl: "https://authentik.company/application/o/gitea-slug/.well-known/openid-configuration"
          iconUrl: "https://goauthentik.io/img/icon.png"
          scopes: "email profile"